Archive for 2001

Mail-Order Nurseries

Icon Written by Geoff on February 1, 2001 – 6:20 pm

For the past month we have all been receiving gardening catalogs through the mail. Most of these are like old friends to us. What would the Winter be without the Seeds of Change or Jung Seed Catalogs? For the gardener, this is the time of year when we can sit back browse the pages and plan this year’s garden.

The last few seasons we have seen some major changes in the mail-order plant and seed industry. The trend is toward consolidation of some major players. White Flower Farms is a good example of a company who has made some major purchases starting with the Daffodil Mart and ending who knows where. We see from our recent catalog from Shepherd’s Seeds is now in the White Flower family.

Is this trend good or bad for the home gardener? We are still trying to decide how we feel on this one. Surely we are going to miss some old friends, businesses we have learned to trust and depend on over the years. We will treat these mergers as we would any new company and give them a try with a few smaller orders to see just how they will measure up.

Our concern is that we will see the personal service we have all learned to respect when some of these tried and proven nurseries go by the wayside. We all know what to expect if we go to a major discount center such as K-Mart, Target, Wal-Mart, or Lowes with a question or seeking that “Special Plant” we read about in Green Scenes. These places are excellent for sources for the more common plants and they do offer good pricing, just do not ask a question or expect much service. Also, we have always questioned just how much training in plant care these “Sales Associates” have received. We cannot help but carry these feelings over to the consolidated mail order companies.

We could be wrong about our uneasy feeling of this new trend in the gardening industries. You have all seen this trend in other industries such as banking, drugs, and even medical communities. We liked it when we knew Bill the bank president or Fred the druggist was looking out for our welfare. Gardening to us is a very personal recreation and requiring a personal touch. Part of the fun of gardening is discussing our plants with others of a like interest. This is why, even if the price is a little higher, we always patronize our local garden center first. Life would be just a little less fun without them.

While we will continue to give the “Wal-Marts” of the gardening industry an opportunity to prove themselves, the proven nurseries will receive our patronage. Old friends like Niche Gardens, Brent and Becky’s Bulbs, and Plants Delight are hard to beat.

All change is not for the worse. We have seen some fine new nurseries such as Naylor Creek come on the seen. We just need to keep out eyes open so we do not miss them. Every day more gardening sites appear on the Internet, most good sites will soon have a loyal following only too willing to expound on their virtues. Good references on sites can be found in periodicals such as Green Scene, Horticulture, or the Advent Gardener. Another good resource can be found by joining a gardening email list such as Perennial List at perennials @mallorn.com. This “List” is made up of gardeners, for gardeners, and by gardeners. Each day’s postings are full of useful information and conversation. To subscribe simply send an Email to Majordomo@mallorn.com with this message in the body of your Email subscribe perennial (your Email address).

The Garden Gate is a site with references to almost any topic you could think of in gardening. The Garden Gate’s Gardening Lists (http://www.prairienet.org/garden-gate/maillist.htm) provides a quick source for those interested in subscribing.

We are always looking for new nurseries that fit out needs. Personally, we like to order over the Internet. It is quick, accurate, efficient, and safe. Also, we have found that we get better and quicker responses to our questions by email. Most of the newer companies coming on board have very good user friendly sites with loads of information for the gardener.

Posted in  


The Living Christmas Tree

Icon Written by Geoff on January 1, 2001 – 8:09 pm

In December’s Yard Talk we made a case against using a potted conifer as a Christmas Decoration. In fact we said: 

“A word of caution for those choosing a potted tree, they require careful planning and a lot more work. We prefer cut living trees that are recyclable. In our area in Zone 5 in Southwestern Lower Michigan, we have seen too many trees that did not survive the harsh Winters.”

 
While we still stand by our statement that a living tree is not for everyone from the feedback we received that more and more people are choosing the potted tree. Last season almost 18 percent of the trees sold in our area were potted or ball and burlaped. 

Two Christmas tree farms in our area have even switched part of there “cut your own” acreage to “dig your own”. They both provide the shovels, burlap, and twine with the customer supplying the muscle. Even with the average tree weighing 150-200 pounds they report that business was brisk. Another individual reported that a nursery in their area lets you select a tree in the warmer seasons then will dig and wrap it just before the holidays. They even offer delivery and decorating services. 

The advantage to both of these methods is that you are assured of getting a tree which will grow in your area. Also you know how long the tree has been dug. In the first case you even have control of how it was dug and wrapped or potted. The advantage in the later case is that the tree is being handled and transported by professionals with professional equipment. 

It use to be that living trees came only balled and burlaped or in plastic pots. Once and awhile a retailer would stick a tree in a half whiskey barrel but that was about all. Today you have a much wider choice from light weight concrete/fiberglass pots to the newer decorative tubs made from recycled plastics. We have seen pots which would hold a 5-7 foot evergreen, that could easily be moved with the assistance of a few friends,. Using a large pot not only allows for better planting but, ease of watering. Also, a large pot will not dry out as quickly. One individual always sprays her tree with Wilt Pruf before she brings the tree in and again when she moves it out. This helps the tree hold moisture and prevents drying out. 

These large potted evergreens can be easily rolled outside with a hand cart. The tree, once outside and placed in a sheltered area, can be easily mulched with straw or marsh hay. With wind protection, careful watering, and treatment with an anti-transpirant the tree has a good chance of survival. 

Another way to “winter over” a tree is to rent space in your local florist’s or nursery’s greenhouse. Usually these greenhouses are pretty bare after the holidays. The current popularity of sun rooms also offers a place to store a tree. These attached rooms which, while unheated, are usually above freezing and offer suitable storage. Even if you do not have one you probably know someone that does who will be more than happy to help out. 

If you forgot to prepare a planting hole before the ground froze and all else fails you can always hire or rent a tree spade. These large hydraulic powered shovels can penetrate even the hardest frozen ground. While not cheap, $100.00- $200.00 depending on the size, they will plant any tree you can get into your house. Even with this method, adequate shelter and water are important. 

Living trees require careful planning and more work than other forms of Christmas Trees. Remember, a lot of this work is after the joy and glitter of the holiday season is over. If you are planning a ski vacation or heading south for the winter someone still must take care of “the tree”. This is why we do not think selecting a live tree should be taken lightly. After all why go through the trouble of selecting a living tree, potting it, and bringing it into your home only to have it die.

Posted in  


Rose Care for Zone 5

Icon Written by Geoff on January 1, 2001 – 7:48 pm

Planting a New Rose

For roses in a box:
if the dirt around the rose is wet enough to stay around the rose remove box. If it is too dry plant the rose with it still in the box. Dig a hole deep enough for the crown of the rose to be about 2 inches below the dirt. Put the rose or the box in the hole and fill halfway with dirt. Compact the dirt, I usually use my foot to do this. Fill the rest of the hole with water. Once the water is gone I put a hand full of Bone Meal around the rose. Put the rest of the dirt around the rose and compact it again. At this point I add a capfull of Systemic and scrape it into the dirt. Add water. Then pile dirt around the plant for a couple of weeks. Carefully remove the dirt that you piled around it after two weeks and it should have some new shoots growing. 

For a bare root rose:
Dig hole the same but at the bottom of the hole add peat and dirt and form a cone and set the rose on that and distribute the roots evenly around the cone. Proceed as with a rose in a box. This is the only time I add bone meal or systemic during the season.

Spring Care

On already established roses, after carefully removing the dirt so that you don’t break off any new shoots, dig three little holes around the roses and add one handful of Bone Meal distributed evenly in the three holes. Cover holes. Add a capful of systemic around the top and scratch into soil. This is after you have removed the dirt and cut off bad stems.

Growing Season Care

I spay them about every 10 days with Orthenex Insect and Disease Control to prevent bugs and black spot. In between the ten days I spay them with Miracle-Gro Fertilizer. There is also a bloom builder that I spray them with. This can be done at the same time as the fertilizer. When you cut off the dead roses they should be cut at a diagonal just above the second five leafed stem. Make sure you put tar on the cut you make or bugs will bore down into the cut and kill the stem.

Fall Care

Somewhere between mid October to end of October, I have been out the first week of November in the snow doing this, cut back all stems to about a foot tall. Pile dirt with peat mixed in around the rose until the dirt is about six to eight inches up the rose. Then forget about them till spring.


Water and Gardening

Icon Written by Geoff on January 1, 2001 – 5:48 pm

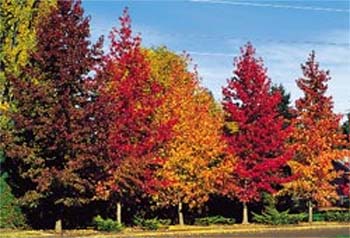
September is a transition month, not quite Fall but no longer Summer. Here in Zone 5 in Southwestern Michigan, the Summer flowers have seen better days while the Fall asters and toad lilies have not yet started to bloom. We always use this time to evaluate our gardens, to see what worked and what did not. September is also when we decide what changes we want to make in our gardens. If you are like us, there is always something new to try or do differently. This is the time of year my wife guards her lawn as a mother hen guards her chicks as it seems to disappear as if by magic. This leads us into this month’s topic, “New Garden Site Preparation.” 

We always start in late summer to prepare next season’s new bed sites. Since this is usually a slow time of year, it allows us to spend the time we need on this important function. Good soil is the basis on which all successful gardens are built. We view top quality soil as relatively dark in color, active in microorganisms, plant nutrients, organic matter, and a pH between 5.5 and 7.5. Since a garden is usually in place for many years, it’s vital that the soil be properly prepared before planting. 

The first step, once you have selected a site, is to have your soil tested. You need to know the strength and weaknesses of the soil you are starting with. Your local Extension Agent can help you obtain soil test forms and instructions. The test result will be your guide for all future work. 

If the results of your test suggest adding lime, now is the time to do it. Often we have heard people say that they will add lime later as a top dressing like they do on their lawns. Gardens are different from lawns, apply the lime “Now” and “Work it in Deeply.” Having the proper pH is critical for plants to absorb the nutrients they need. 

The next amendment you want to look at is organic matter. Your soil should contain at least 5% organic matter. Work in at least 3 – 4 inches of compost or well-rotted manure. Till the organic matter into a minimum depth of six inches. Surface application of organic matter does very little for new soil. By preparing beds in September, you can incorporate yard waste such as leaves, crop residues, straw, or similar items as they will decompose during the fall and winter. 

If your soil test recommends the addition of other nutrients, we like to add them at this time. This is a personal preference of ours and you could wait until actual planting if you like. This is one area where we like to use chemical fertilizers as a source of nutrients. We feel they allow us to more accurately control the application that translates into stronger plant growth. Remember, this is probably the last time you can work the soil so thoroughly. 

Just how deep you should till the soil is a hard question to answer. With our heavy clay soils we cannot work the soil deep enough. Six inches is the bare minimum with 12 – 18 inches preferred. If you are planning to plant deep-rooted plants, you may have to go even deeper. This is another reason we like to start new beds in September as we have the time to work the soil to its maximum. 

Once we have the soil thoroughly tilled, we like to work in an additional one inch of organic matter and plant a cover crop of rye grass or buckwheat. This protects the soil from wind and water erosion and adds organic matter. These cover crops called “Green Manures” are usually tilled into the soil two to three weeks before planting. 

Take your time while preparing a new bed, work everything in thoroughly and deeply, and protect your investment with a cover crop. The time you invest now preparing the soil will produce years of strong healthy plants. In future issues we will talk about extreme soil conditions such as rocky or heavy clay which take some special treatment. Again, take your time and do it right, as once the plants are in, it is very hard to make corrections.

Posted in  


The Soil in My Garden

Icon Written by Geoff on January 1, 2001 – 5:40 pm

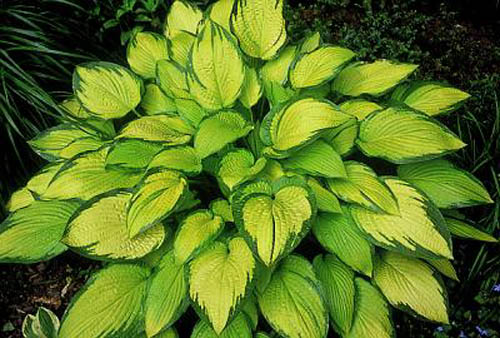
Last September we discussed “New Garden Site Preparation” and how we always start in late summer to prepare next season’s new bed sites. Good soil is the basis on which all successful gardens are built so, we like to look at our soil every fall. This is a slower time of year for us and we can take the time to work with the soil, make amendments as required, and get it ready for next season. Top quality soil is dark in color, active in microorganisms, plant nutrients, organic matter, and a pH close to 6.5. 

The first step is to have your soil tested. Soil test kits are available from most nurseries and mail order catalogs. Private companies also do soil testing, they provide detailed reports and recommendations but, may be expensive. Actually, your local Extension Agent is probably your best source for home garden soil testing. Whatever source you use, make sure they include testing minor or trace elements. You need to know the strength and weaknesses of the soil you are starting with. 

There are sixteen nutrients that are essential for the growth and reproduction of plants, thirteen of these essential elements are found in inorganic and organic fertilizers and are often divided into three groups. The primary nutrients include the elements nitrogen, phosphorus, and potassium. The secondary nutrients include sulfur, calcium, and magnesium. The third group of essential elements is called micronutrients as they are required by the plant in small amounts. These nutrients include iron, manganese, boron, zinc, copper, molybdenum, and chlorine. Once you have your soils test results back, you can correct any deficiencies through the application and through blending of soil amendments. 

Any addition to the soil that improves its physical or chemical condition, is considered a soil amendment. Many types of amendments are available to the gardener to change pH and nutrient levels. The correct soil pH is essential for optimum plant growth. Dolomitic limestone adds calcium and magnesium as it increases pH, making the soil more alkaline. Wood ashes raises soil pH, but you must apply twice as much ash as limestone for the same effect. Sulfur is used to acidify garden soil. 

The amount of amendment to add depends on the current and desired pH. Peat moss can also be used to effect the pH of the soil although, harder to use as their effect varies by type and where mined: 

  • Sphagnum moss peat 3.0 to 4.0
  • Hypnum moss peat 5.0 to 7.0
  • Reed-sedge peat 4.0 to 7.5
  • Decomposed peat 5.0 to 7.5

Peat Moss Frequently Asked Questions by the Canadian Peat Moss Association at http://peatmoss.com/pm-efaq.html is a good source for further information. 

Other amendments are added specifically to improve soil nutrient levels. Green sand and granite meal are sources of potassium. Granite meal is finely ground granite rock that releases its potassium slowly. Green sand is relatively low in potassium, which is readily dissolved. Additional nutritional amendments that can be purchased for garden use include cottonseed meal, kelp meal, leather meal, and worm castings, as well as an array of synthetic fertilizers. Other agricultural byproducts such as peanut shells, tobacco stems, rice hulls, corn cobs and other fibrous agricultural byproducts are sometimes available for soil additives or mulching. 

Some amendments will improve the soils’ quality and texture. The composition of soil consists of four parts: mineral matter, organic matter, water, and air. The relative amounts of mineral and organic matter determine the physical properties of soil. Soil texture is influenced by the amounts of three groups of soil particles. The three soil separates are sand, silt, and clay. Texture is how the soil feels. Soil texture describes the mixture of sand, silt and clay particles for a given soil. A coarse soil has a large amount of sand, silt soil has the texture of flour, and loam soil has nearly equal amounts of sand, silt, and clay. Sand particles can be seen by the naked eye. A microscope must be used to see silt particles. An electron microscope is needed to see clay particles. By changing the percentages of sand, silt, and clay we can alter the texture and thus, the moisture retention abilities of the soil. 

The regular addition of manures, compost, cover crops, and other organic matter can raise the soil nutrient and structure level. Soil structure refers to the arrangement of sand, silt, and clay particles. Organic matter is often referred to as the glue that holds everything together. When using animal manures, it is recommended to let it compost for at least six months before using. Even if you are going to compost manure with yard waste, it still needs to sit. Desirable soil quality does not come about with a single or even several additions of organic material but, requires a serious, long term program. 

The use of compost is a way to improve soil structure. Correct composting can result in a valuable nutrient and humus source for any garden. The basis of the process is the microbial decomposition of mixed, raw, organic materials into humus. For more information on composting go to the Compost Resource Page athttp://www.oldgrowth.Org/compost/ This site is intended to serve as a hub of information for anyone interested in composting. 

As you can see, there are many options available to you once you have had your soil tested. Whatever amendments you end up using, it is important to work them in deeply, at least six to eight inches. You need to blend them well as not only do they breakdown better but, a plant’s root system will develop better in a well-mixed medium. We prefer the fall because the amendment has a better opportunity to decompose and be available in the Spring for the plants’ use.

Posted in